7links px 3309 Software 13: A Comprehensive Guide to the Features and Functions of the IP Camera Software
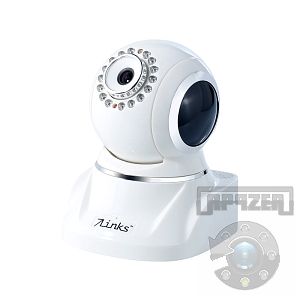
If you are looking for a reliable and easy-to-use software for your IP camera, you might want to check out 7links px 3309 software 13. This software is designed to work with the 7links Pan-Tilt-IP-Kamera LAN/WLAN with IR-LEDs & Motion Detection, a wireless IP camera that can monitor and control your home or office day and night and send the images to the web. You can access and control the camera remotely via a web browser, thanks to the integrated web server and password protection.
In this article, we will provide you with a comprehensive guide to the features and functions of 7links px 3309 software 13. We will explain how to install and configure the software, how to use the web interface and the Windows software, how to set up the motion detection and email alert, and how to troubleshoot some common issues. By the end of this article, you will be able to use 7links px 3309 software 13 with confidence and ease.
How to Install and Configure 7links px 3309 Software 13
To install and configure 7links px 3309 software 13, you need to follow some steps, such as:
- Connect the IP camera to your router via a LAN cable and plug in the power adapter.
- Insert the CD-ROM that came with the IP camera into your computer and run the setup.exe file.
- Follow the instructions on the screen to install the software and drivers.
- Launch the IP Camera Tool from your desktop or start menu. The tool will automatically detect your IP camera and display its IP address.
- Double-click on the IP address of your IP camera to open it in your web browser. You will be prompted to enter a username and password. The default username is admin and the default password is blank.
- Once you log in, you will see the web interface of your IP camera. You can adjust various settings such as network, video, audio, alarm, etc.
- If you want to use your IP camera wirelessly, you need to set up the WLAN settings. Go to Device Management > Basic Network Settings > Wireless LAN Settings. Click on Scan to search for available wireless networks. Select your network and enter your password if required. Click on Submit to save the settings.
- Unplug the LAN cable from your IP camera and restart it. The IP camera will connect to your wireless network automatically.
- You can now access your IP camera from any device that has a web browser and an internet connection. You can also use the Windows software that comes with the IP camera to view and control multiple cameras at once.
How to Use the Web Interface and the Windows Software of 7links px 3309 Software 13
To use the web interface and the Windows software of 7links px 3309 software 13, you need to know some basic functions, such as:
- The web interface consists of four main sections: Live Video, Device Status, For Administrator, and Help. You can switch between these sections by clicking on the tabs at the top of the page.
- The Live Video section shows you the live video stream from your IP camera. You can control the pan and tilt of your camera by clicking on the arrows or dragging on the video. You can also adjust the brightness, contrast, resolution, frame rate, etc. by clicking on the icons below the video.
- The Device Status section shows you some information about your IP camera such as device name, firmware version, MAC address, etc. You can also view the system log and upgrade the firmware from this section.
- The For Administrator section allows you to change various settings of your IP camera such as network, video, audio, alarm, user management, etc. You can also reboot or restore your IP camera from this section.
- The Help section provides you with some
How to Set Up the Motion Detection and Email Alert of 7links px 3309 Software 13
To set up the motion detection and email alert of 7links px 3309 software 13, you need to follow some steps, such as:
- Go to the web interface of your IP camera and log in with your username and password.
- Go to For Administrator > Alarm Service Settings > Motion Detect Armed.
- Check the box next to Enable Motion Detection and adjust the sensitivity and area of the motion detection according to your preference.
- Click on Submit to save the settings.
- Go to For Administrator > Alarm Service Settings > Mail Service Settings.
- Check the box next to Enable Sending Mail on Alarm and enter your email address, SMTP server, port, username, password, etc. You can also enter a receiver email address and a subject for the email alert.
- Click on Submit to save the settings.
- Click on Test to test if the email alert works properly. You should receive an email with two pictures from your IP camera.
- If everything works fine, you can exit the web interface. If not, you can check your network connection, email settings, or firewall settings and try again.
Now, whenever your IP camera detects any motion, it will send you an email alert with two pictures. You can also view the alarm records from the web interface or the Windows software.
How to Troubleshoot Some Common Issues of 7links px 3309 Software 13
If you encounter some common issues of 7links px 3309 software 13, you can try some solutions, such as:
- If you cannot access your IP camera from your web browser, you can check if your IP camera and your computer are connected to the same network, if your IP camera has a valid IP address, if your web browser supports ActiveX controls, or if your firewall or antivirus software is blocking the access.
- If you cannot use your IP camera wirelessly, you can check if your wireless network is working properly, if your IP camera has a strong signal strength, if your wireless network settings are correct, or if your wireless router supports DHCP.
- If you cannot receive email alerts from your IP camera, you can check if your email settings are correct, if your network connection is stable, if your email server supports SMTP authentication, or if your email provider has any spam filters or security policies.
- If you have any other issues or questions about 7links px 3309 software 13, you can refer to the user manual that came with the IP camera, visit the official website of 7links, or contact the customer service of PEARL, the distributor of 7links products.
What are the Benefits and Advantages of Using 7links px 3309 Software 13
Using 7links px 3309 software 13 has many benefits and advantages, such as:
- You can monitor and control your home or office remotely via a web browser or a Windows software. You can view the live video stream, control the pan and tilt of your camera, adjust the video and audio settings, etc.
- You can use your IP camera wirelessly without any cables. You can place your IP camera anywhere within the range of your wireless network and enjoy the flexibility and convenience.
- You can set up the motion detection and email alert to keep you informed of any suspicious activities. You can adjust the sensitivity and area of the motion detection and receive an email with two pictures whenever your IP camera detects any motion.
- You can use your IP camera securely with password protection and user management. You can assign different access levels and passwords to different users and prevent unauthorized access to your IP camera.
- You can use your IP camera with high quality and performance. You can enjoy a high resolution of up to 640 x 480 pixels, a high frame rate of up to 30 fps, a high light sensitivity of 0.5 lux, and a night vision of up to 10 meters.
What are the Requirements and Specifications of 7links px 3309 Software 13
To use 7links px 3309 software 13, you need to meet some requirements and specifications, such as:
- You need to have a compatible IP camera, such as the 7links Pan-Tilt-IP-Kamera LAN/WLAN with IR-LEDs & Motion Detection. You also need to have a power adapter, a LAN cable, an antenna, a wall mount, and a CD-ROM that came with the IP camera.
- You need to have a computer that runs on Windows XP/Vista/7/8/10. You also need to have an internet connection, a web browser that supports ActiveX controls (such as Internet Explorer 6/7/8), and a CD-ROM drive.
- You need to have a router that supports DHCP and WLAN (such as IEEE 802.11g). You also need to have a wireless network that has a WEP/WPA/WPA2 encryption.
- You need to have an email account that supports SMTP authentication. You also need to have an email server that has a valid SMTP address, port, username, password, etc.
The specifications of 7links px 3309 software 13 are as follows:
- Software version: V1.0
- File size: 6.5 MB
- File format: .exe
- Language: English/German
- License: Freeware
How to Download and Update 7links px 3309 Software 13
To download and update 7links px 3309 software 13, you need to follow some steps, such as:
- Go to the official website of 7links and find the product page of your IP camera.
- Click on the Download tab and look for the latest version of 7links px 3309 software 13. You can also check the release notes and the user manual from this tab.
- Click on the download link and save the file to your computer.
- Run the setup.exe file and follow the instructions on the screen to install the software.
- Launch the IP Camera Tool from your desktop or start menu. The tool will automatically detect your IP camera and display its IP address.
- Double-click on the IP address of your IP camera to open it in your web browser. You will be prompted to enter a username and password. The default username is admin and the default password is blank.
- Go to For Administrator > Upgrade Device Firmware. Click on Browse and select the firmware file that you downloaded from the website.
- Click on Upgrade to start the update process. Do not turn off or disconnect your IP camera during the update.
- Wait for the update to finish and restart your IP camera. You can check the firmware version from the Device Status section.
You have successfully downloaded and updated 7links px 3309 software 13. You can enjoy the new features and improvements of the software.
How to Uninstall and Remove 7links px 3309 Software 13
To uninstall and remove 7links px 3309 software 13, you need to follow some steps, such as:
- Go to your start menu and open the Control Panel.
- Click on Programs and Features or Add or Remove Programs depending on your Windows version.
- Find and select 7links px 3309 software 13 from the list of programs and click on Uninstall or Remove.
- Follow the instructions on the screen to uninstall the software.
- Delete any leftover files or folders related to 7links px 3309 software 13 from your computer.
You have successfully uninstalled and removed 7links px 3309 software 13. You can reinstall it anytime if you want to use it again.
Conclusion
7links px 3309 software 13 is a reliable and easy-to-use software for your IP camera. It allows you to monitor and control your home or office remotely via a web browser or a Windows software. It also enables you to set up the motion detection and email alert to keep you informed of any suspicious activities. You can use your IP camera wirelessly, securely, and with high quality and performance.
To use 7links px 3309 software 13, you need to install and configure the software, use the web interface and the Windows software, set up the motion detection and email alert, and troubleshoot some common issues. You also need to meet some requirements and specifications of the software. You can download and update the software from the official website of 7links or uninstall and remove it if you don’t need it anymore.
We hope this article has helped you learn more about 7links px 3309 software 13 and how to use it with your IP camera. If you have any questions or feedback, please feel free to leave a comment below. Thank you for reading!
https://github.com/durchproxnime/socket.io/blob/main/docs/X%20Force%20Keygen%20Maya%20LT%202013%20Activation%20How%20to%20Crack%20Autodesk%20Software.md
https://github.com/0lesfuVceho/Gerapy/blob/master/gerapy/Gta%20Iv%20Patch%201.1%203%20Crack%20Indirl%20Enjoy%20the%20Improved%20Graphics%20and%20Gameplay%20of%20GTA%204%20with%20the%20New%20Patch.md
https://github.com/1biotiggrumsa/ip2region/blob/master/binding/php5_ext/Step%20Up%204%20Movie%20Download%201080p%20How%20to%20Get%20the%20Full%20Experience%20of%20the%20Dance%20Drama.md
https://github.com/1laufremZdeschi/Data-Science-For-Beginners/blob/main/docs/Hero%202002%20Bluray%201080p%20DTS%20X264EOS%20Enjoy%20the%20Action%20and%20Drama%20of%20the%20Classic%20Wuxia%20Film%20in%20Full%20HD.md
https://github.com/9peviulyo/Data-Science-For-Beginners/blob/main/images/Cummins%20Insite%20Keygen%20Sultan%20hit%20How%20to%20Get%20the%20Latest%20Version%20of%20Cummins%20Insite%208.7%20for%20Free.md
https://github.com/0talymonsra/FNA/blob/master/abi/X-force%20Tinkercad%202009%20Free%20Download%20A%20Cracked%20Version%20of%20the%20Popular%203D%20Design%20Software%20by%20Autodesk.md
https://github.com/durchproxnime/socket.io/blob/main/docs/Windows%207%20Download%20Media%20Center%20A%20Step-by-Step%20Guide%20for%20Installing%20and%20Configuring%20the%20Feature.md
https://github.com/7junclecWpropda/git-autofixup/blob/master/t/SpongeBob%20SquarePants%20The%20Complete%20First%20Season%20(DVD)%20%20Free%20Download%20Borrow%20and%20Streaming%20%20Internet%20Archive[1].md
https://github.com/crysex0inma/antlr4/blob/dev/.github/Xforce%20Keygen%20Showcase%202012%20Free%20Download%20A%20Review%20of%20Features%20and%20Functions.md
https://github.com/epcicontdo/react-most-wanted/blob/master/packages/rmw-shell/360%20Games%20Patcher%20305rar%20A%20Simple%20and%20Effective%20Tool%20for%20Xbox%20360%20Gamers.md86646a7979